 Tags
Tags
Table of Contents
- 1 Here’s how it works and what it can do.
- 2 Why not just use Blender?
- 3 Step 1: Load your skin (or anyone’s)
- 4 Step 2: Pose your character
- 5 Step 3: Add more characters (up to 32)
- 6 Step 4: Gear up: armor, trims, items and capes
- 7 Step 5: Effects that make it look like gameplay
- 8 Step 6: Pick a background and lighting
- 9 Step 7: Export a high-res PNG for YouTube
- 10 Minecraft Skin Renderer FAQ
If you’ve ever tried to make a Minecraft thumbnail, you know how it usually goes. You watch a 40-minute Blender tutorial, download a rig that only half works, spend an hour figuring out why your character’s arm is bending backwards, and then give up and use a screenshot with the F1 menu hidden.
I’ve been there, more than once. That’s why I built the MineUtils Skin Renderer, a free Minecraft thumbnail maker that runs right in your browser. You don’t install anything, you don’t make an account and you don’t need any 3D experience. You load a skin, pose it, light it and export a PNG you can drop straight into Photoshop, Canva or whatever you use for your thumbnails.
Here’s how it works and what it can do.
Why not just use Blender?
Blender is great. But for most Minecraft creators it’s overkill. You need a rig, you need to understand lighting and render settings, and if you just want a good-looking character for your next video, it’s a lot of work for one image.
Screenshots have the opposite problem. They’re fast, but you’re stuck with in-game poses, flat lighting and whatever background happens to be behind you.
The Skin Renderer sits in the middle: you get proper 3D renders with real control over pose and lighting, and it feels about as hard as dressing up your character in the launcher.
Step 1: Load your skin (or anyone’s)
You’ve got two options:
Type a Java username. The renderer grabs that player’s skin automatically. Super handy if you’re making a thumbnail with your SMP crew.
Upload a skin file. Works with 64×64 Classic (Steve) and Slim (Alex) skins, plus old 64×32 skins.
Your skins stay in your browser. Nothing gets uploaded to a server, and the renderer autosaves your project locally so you won’t lose your work if you close the tab.
Don’t have a skin yet? You can make one in the MineUtils Skin Editor or turn any picture into a skin with the Image to Minecraft Skin converter.
Step 2: Pose your character
This is where screenshots fall short, and it’s the part I spent the most time on.
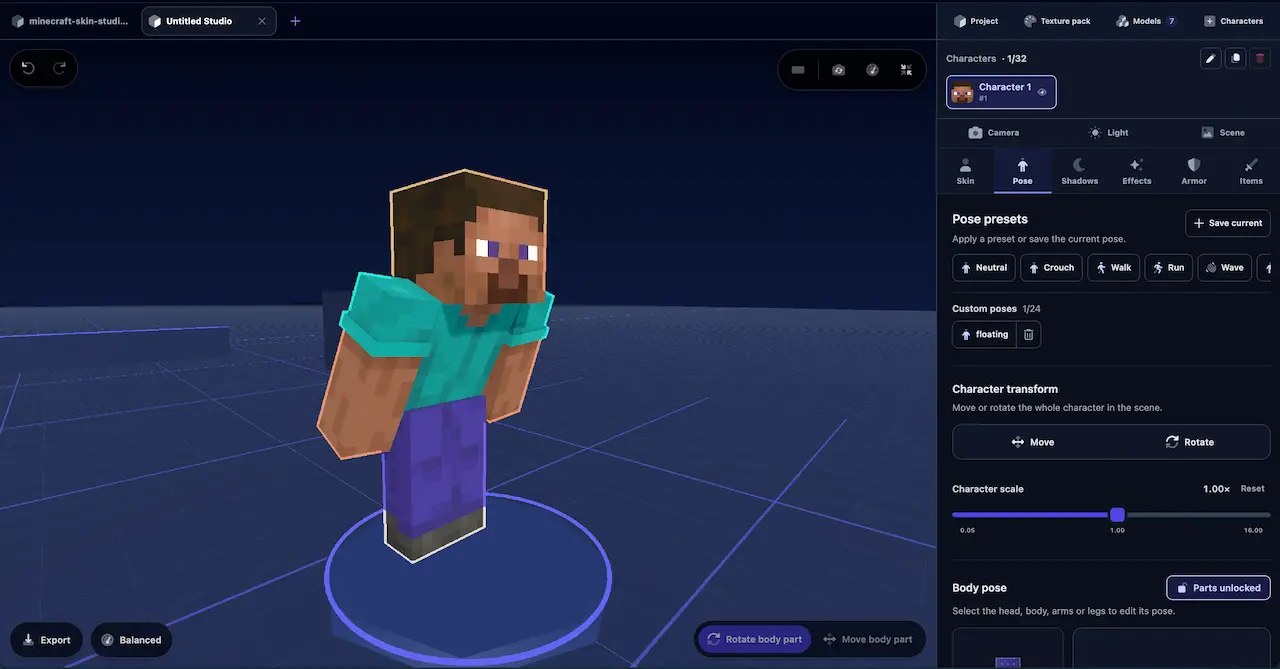
You can click any body part and rotate it however you want: head, arms, legs, torso. If you don’t want to start from zero, there are preset poses to get you going.
There are also animations (idle, walk, run, wave, jump, attack and spin) if you want to preview movement or catch a frame mid-action. The attack one is perfect for those “I fought the Warden” thumbnails.
Step 3: Add more characters (up to 32)
Most thumbnails aren’t just one character. You’ve got your friends, a villain, a mob chasing you, a crowd in the background…
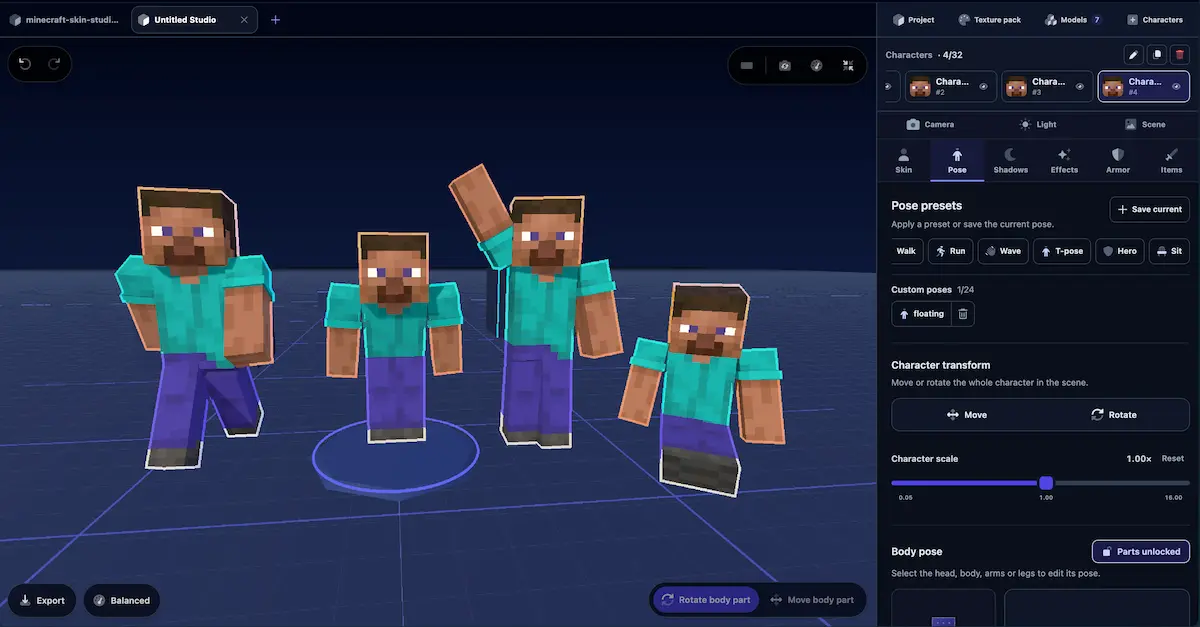
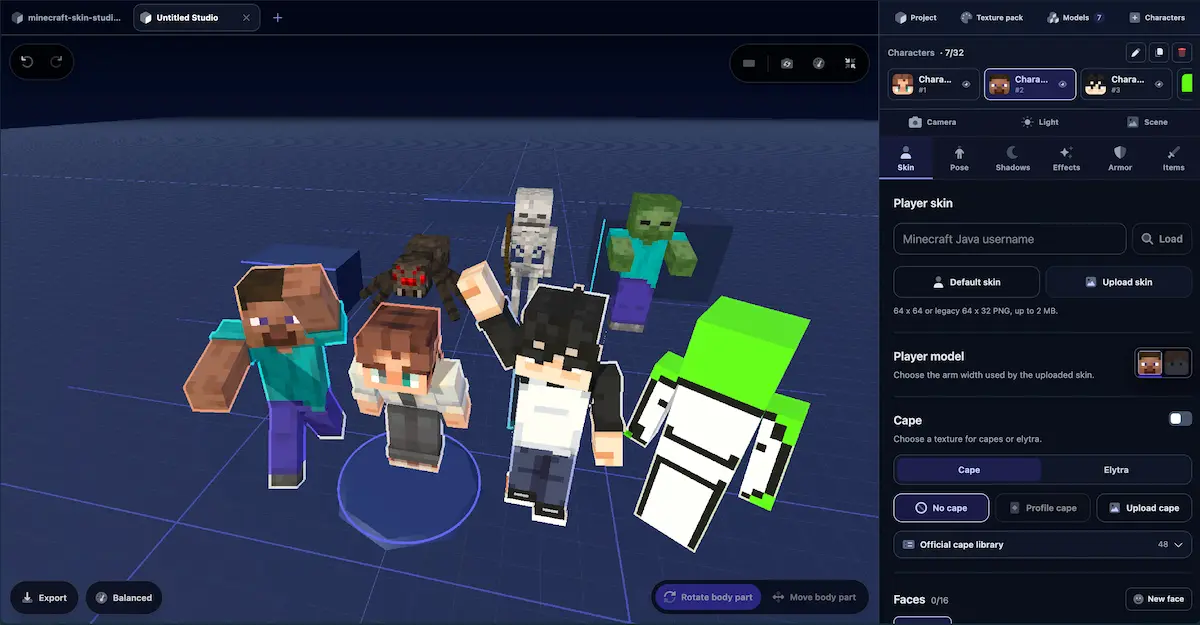
You can have up to 32 characters in the same scene. Add them, duplicate them, pose each one separately and arrange them however you want. It’s great for SMP team shots, 1v1 thumbnails, or “100 players” style videos where you need a crowd.
And it’s not only players. There’s a big library of Minecraft mobs too, so you can put a creeper right behind your character, ride a ghast, or set up a face-off with a mob.
Step 4: Gear up: armor, trims, items and capes
A naked Steve doesn’t really sell a video. You can equip:
- Armor of any material, with armor trims (if you want to test combinations first, try the Armor Trim Visualizer)
- Held items: swords, tools, a spyglass and loads of vanilla items
- Official Mojang capes, or upload your own cape PNG
- Elytra, with a flight mode for those flying shots
If you’re into capes, I wrote a whole post about how to preview any Minecraft cape in vanilla Java. The renderer is the easy way to see how a cape looks with your skin before you go hunting for it.
Step 5: Effects that make it look like gameplay
These are the small details that make a thumbnail look like a real moment from the game instead of a model on a blank canvas:
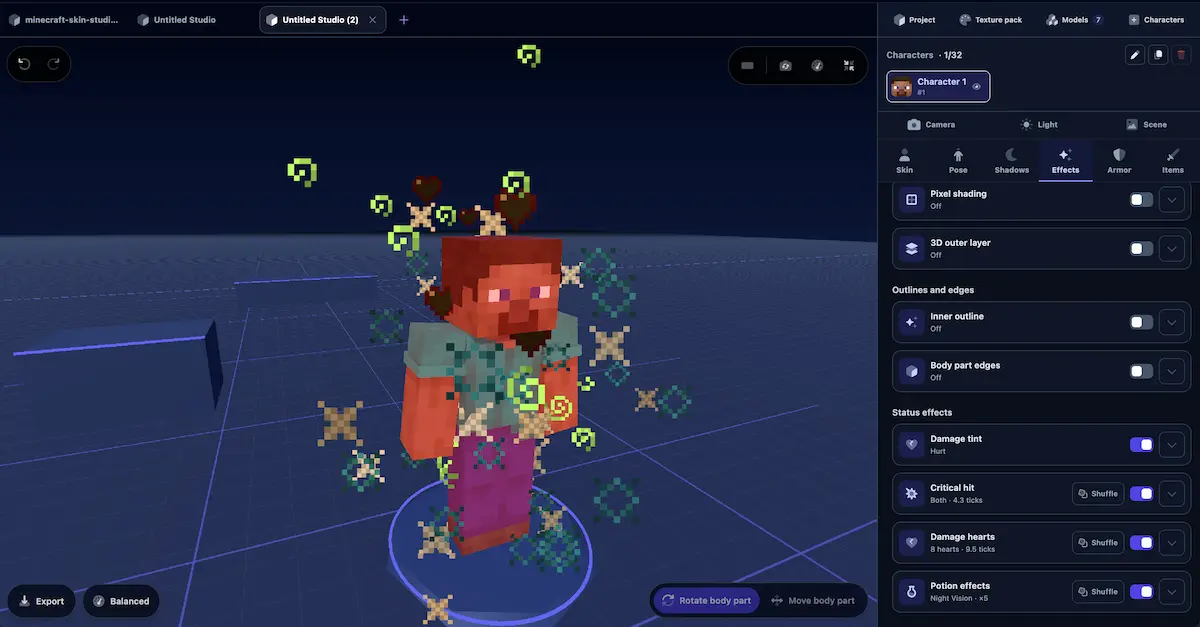
- Potion effects with their particles (there are more than 30, from Regeneration to Darkness)
- Damage hearts and the red hurt flash when a character takes a hit
- Critical hit particles
- Glow and outlines so your characters pop from the background, which is a must at thumbnail size
Step 6: Pick a background and lighting
Lighting is what separates a “meh” render from a thumbnail that grabs attention. You get studio lighting controls, cast shadows and shadow styles, so you can go for a flat clean look or something more dramatic.
For backgrounds you can:
- Use a flat 2D background, a solid color or your own image (PNG, JPG or WebP)
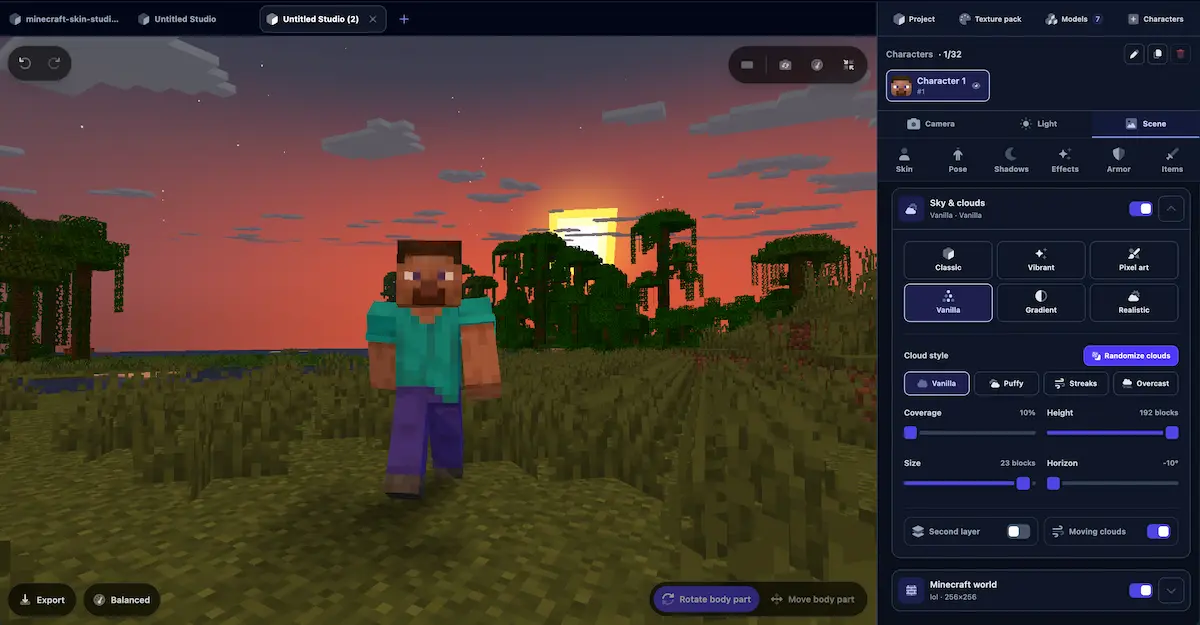
- Build a 3D scene with biomes like Plains, Desert or Snowy, with a sky and clouds
- Change the time of day: day, golden hour, sunset or night
- Switch sky styles: Classic, Vibrant Visuals, Vanilla, Pixel art, Gradient or Realistic
And if you want your actual base or build in the shot, you can import an area of your Java world right into the scene. Your character can stand in front of the house you spent three weeks building, rendered in proper 3D.
You can also load a resource pack (.zip) so everything matches the textures you use on your channel. If you make custom models in Blockbench, you can import those too (.bbmodel, .geo.json and glTF).
Step 7: Export a high-res PNG for YouTube
When you’re happy with it, export it. You can choose:
- Aspect ratio: 16:9 for YouTube thumbnails, 9:16 for Shorts and TikTok, 1:1 for profile pictures, 4:5 for Instagram
- Size: up to 4096 px, so a 16:9 export comes out at 4096×2304, way above the 1280×720 YouTube asks for
- Transparent background: turn off “Include background” and you get a PNG of just your characters, ready to place on top of your own thumbnail design
Honestly, the transparent export is the feature I use the most. You render the characters here, then add the text, arrows and red circles in your usual editor.
A quick workflow that works for me
If you just want to get a thumbnail done today, here’s what I do:
- Load the skin with the username.
- Start from the Hero or Run pose and tweak the arms.
- Give it a weapon and turn on outlines.
- Set a strong side light so you get nice shadows.
- Export at 16:9 with a transparent background.
- Drop it into my editor, add a bright background and a big title.
The whole thing takes about 5 minutes once you’ve done it a couple of times.
Does it work on phones?
Yes. The renderer has touch controls (styled like Minecraft Bedrock’s), two-finger pan and pinch to zoom, and a settings panel that slides up from the bottom. It’s more comfortable on a computer, but you can absolutely make a thumbnail on your phone or tablet.
Minecraft Skin Renderer FAQ
Is the Minecraft Skin Renderer free?
Yes, it’s completely free. No account, no watermark.
Do I need Blender or any 3D software?
No. Everything happens in your browser. You just need a browser with WebGL, which basically every modern one has.
Does it upload my skin anywhere?
No. Skins, backgrounds and projects stay stored locally in your browser.
Can I make transparent Minecraft renders?
Yes. Turn off “Include background” before exporting and you’ll get a PNG with a transparent background.
What thumbnail size should I use for YouTube?
Use the 16:9 ratio. Anything 1280×720 or bigger works, and the renderer goes up to 4096×2304.
Does it work with Bedrock skins?
It works with standard 64×64 skins (Classic and Slim) and legacy 64×32 skins, which covers most Java and Bedrock skins. Usernames only work for Java accounts.
Give it a try
If you’ve been putting off making better thumbnails because Blender looked like too much, give the Minecraft Skin Renderer a try. Load your skin, mess around with the poses for a couple of minutes, and you’ll probably have something better than your last thumbnail before you know it.
And if you make something cool with it, I’d love to see it.